
CAD Administrator Tools
Team Web provides access to your custom help
Team Web provides access to your custom help
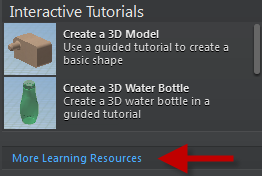
If you require specific workflows designed to meet your company standards, and if the content is subject to change, use Team Web. Launch a site on your company-wide intranet using the Team Web command, and the More Learning Resources link on the Welcome screen. Team members can quickly access customized company help.
Configure your site in the Application Options dialog box, Files Tab. Specify a Web site, page, or file you want the Team Web command to launch. This customized link is accessible on the Welcome Screen More learning Resources, and on the Help menu Team Web.

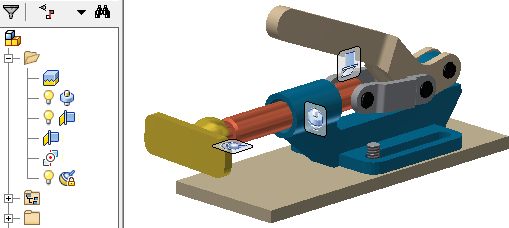
Include assembly graphics in Update Design and Migration tasks
In Task Scheduler, in both the Update Design and Migration tasks, you can control whether to include assembly graphics. Saving the graphics allows Express workflows. The option, Include assembly graphics for Express Mode, is added to the options dialog box for each task. It is turned off by default.
Enhancements for Materials
Improved navigation in the Material Browser
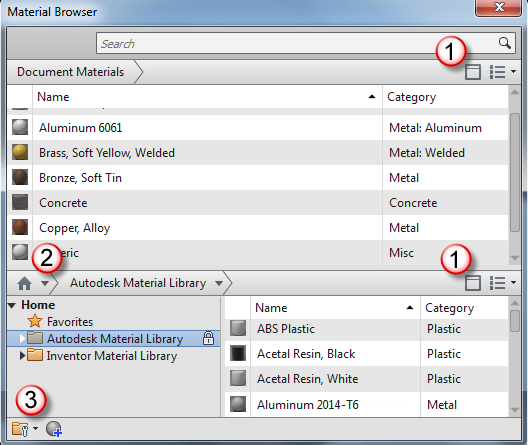
New to the browser:
1. Show/Hide library panel and tree icon give you greater control over your view.
2. Home button to control the display of your saved libraries.
3. icon provides more access to Library operations.
New tabbed interface in the Material Editor
Navigate easier within the Material Editor dialog box using its new tabbed interface. In this interface, you can distinguish the various material assets and their properties.

Multi-select You can now multi-select materials and appearances to add to a library
Lock & refresh icon When being modified, the shared library for both material browser and asset browser display a lock icon.
The shared library for both material browser and asset browser display a refresh icon to indicate that a document material and/or appearance is out of date. You can update by clicking the refresh icon.
Visual aids Italic and underline text (with tooltips) indicate differences between the document materials and appearances and the library.
NoteA significant number of enhancements were made in Inventor 2013 Service Pack 1.1. Review the Autodesk Inventor 2013 Service Pack 1.1 for full information.
New notifications and behaviors for shared assets
You now have greater control over assets in your material and appearance libraries:
- You will be notified when you add or copy an asset (appearance) to a library if that asset name that already exists in the library. When you add an asset to a shared library that has the same name and different properties, you will be notified that an asset with that name already exists and have the option to keep both or replace. If you choose to replace, all materials referencing the asset are updated to use the new asset.
- You will be notified when you rename an appearance asset that is in use. For example, if you rename the color Green to Bright Green and Green is referenced by multiple materials, all materials referencing the asset Green are updated to use the new color name, Bright Green if you choose to rename the asset.
- The option to delete is now disabled on an asset that is shared with one or more materials in a library. You can now find out where the asset is being used by selecting the new Where Used from the context menu in the Appearance Browser.
- You will be notified when attempting to add a material to a library with a material name that already exists in the library and have the option to keep both or replace.
Deploy additional software
Include add-ins, components, and other applications when creating a deployment. On the Create Deployment product landing page, click anywhere in the Include Additional Softwarebox to access the controls.
Control access to Autodesk Exchange
Block access to Autodesk Exchange when creating a deployment. On the Create Deployment product landing page, click anywhere in the Autodesk Inventor 2014 box to access the Autodesk Exchange Apps Access control. Select to block access to Autodesk Exchange within Inventor.
Export errors from Task Scheduler log file to Excel
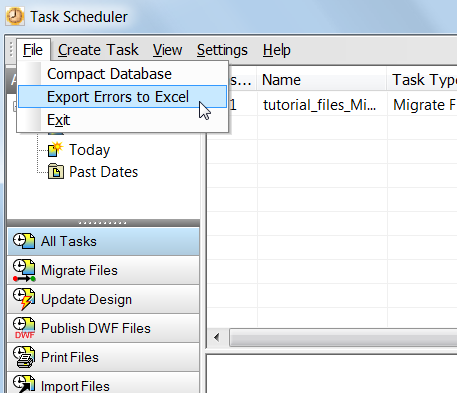
Task Scheduler generates log files in .mdb format to report task errors. You can export the log file entries of one or more tasks from the Task Scheduler .mdb file format to an Excel spreadsheet.
The Excel file generates a separate sheet for each error type. The first column of each sheet lists the error files. The second column lists the corresponding task names.
Export Errors to Excel is available on the Task Scheduler File menu, and on the context menu for a selected task.
Comments0
Learning Tools
Basic skills interactive tutorial
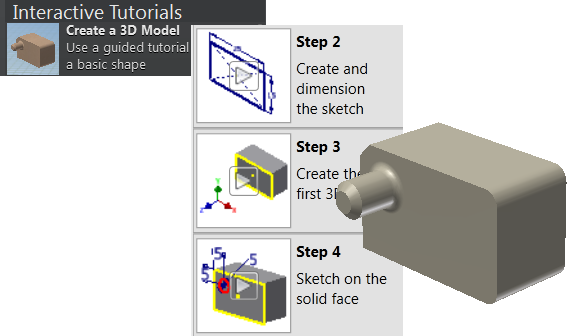
A new basic skills interactive tutorial steps you through the commands and workflows for creating 3D objects in Inventor.
Connect interactive tutorial
A new tutorial introduces the new assembly Connect command. The tutorial leads you through applying explicitly defined connections to locate components and define motion in one step.
Create interactive tutorials
You can create your own interactive tutorials for internal use or to share with others.
Download the instructions and starter files for 64-bit systems here:
http://www.autodesk.com/interactive_tutorial-2014-64bit
Download the instructions and starter files for 32-bit systems here:
http://www.autodesk.com/interactive_tutorial-2014-32bit
Location for interactive tutorials no longer restricted
The interactive tutorials were previously installed in the Program Files area, which is a restricted access location. The new install location is in a public area. With no administrator rights required, anyone can add new interactive tutorials.
The new location is: <drive>:\Users\Public\Documents\Autodesk\Inventor 2014\Interactive Tutorial\en-US\
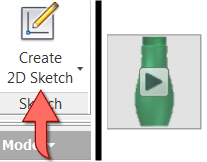
Interactive tutorial visual enhancements
The new size, shape, and color of the ribbon command pointer, and the video play button provide greater visibility.
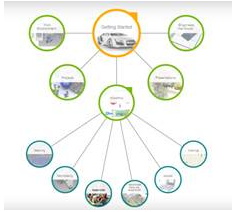
Learning map helps you build and track skills
Like a geographical map, the learning map guides you along the pathways you need to efficiently learn Autodesk Inventor. It tracks the topics, videos, tutorials, and other resources you visit, and helps you chart your next steps forward. As you navigate through the map, you quickly acquire the skills you need to use Autodesk Inventor.
Access the Learning map from the Help menu: Learning Tools Getting Started, to start exploring and learning.
Note that you can browse the learning map and read all the content you want. To Like a page or Mark As Read, you must sign in with your Autodesk ID and password. If you do not have an Autodesk account, click Need an Autodesk ID and follow the instructions.

You must be logged in to post a comment.